Visible Mending: Why Clothing Repairs Became Part of the Design
Visible mending can strengthen worn clothing while making repair part of its design. Learn how to choose patches, thread, and stitches that suit the fabric.
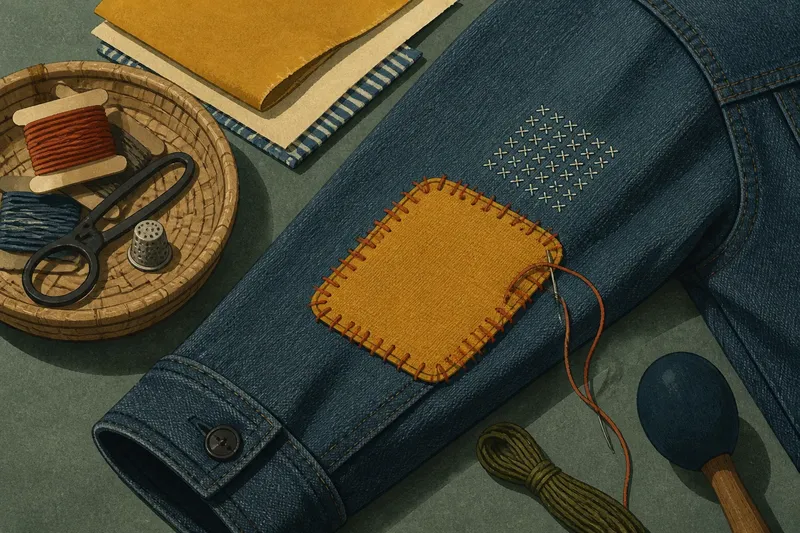
A bright patch on a jacket sleeve can catch the eye before its stitches do. Visible mending leaves a repair in view, and its history is less a straight path from necessity to fashion than a change in what people choose to show.
Visible mending’s roots
For much of clothing history, repairing a garment was ordinary household work. Before inexpensive ready-made clothing was widely available, a tear could make a useful garment less serviceable. A patch covered an opening, while darning rebuilt worn areas. The purpose was to extend use, not to announce a style.
That practical aim did not mean every repair looked the same. A mender might use matching cloth for a discreet fix, or use what was available when a close match was not at hand. The result depended on the fabric, the damage, and the materials in the household.
As sewing skills became part of domestic life, careful stitching could also express attention and craft. Decorative stitches and embroidery sometimes sat alongside functional repairs. But a tidy or ornamental repair should not be mistaken for a new invention: people have long made choices about how to handle damage, even when necessity limited those choices.
From necessity to choice
Visible repairs have carried different meanings in different circumstances. A patch might suggest thrift or limited access to new clothing; it might also show care for a garment or the skill of its mender. The same repaired sleeve could be read differently by its wearer and by someone else.
Contemporary visible mending often treats that visibility as a design decision. A contrasting thread, a shaped patch, or a row of decorative stitches can make the repair part of a garment’s appearance. This does not remove the practical task: the stitching still needs to hold, and the material still needs to support the damaged area.
Say you have a denim shirt with a small tear near its lower hem and a scrap of sturdy cotton from an old shirt. You check that the denim around the tear is firm, trim the scrap with rounded corners, place it behind the opening, and sew around the edge with contrasting thread. The observable result is a visible border over a supported tear; if the surrounding denim pulls or puckers as you stitch, you stop and reassess rather than tightening the patch against weak cloth.
Choose a sound repair
Start by examining the area around the hole. If nearby fibers are thin or breaking, a small patch may concentrate strain at its edge. A larger support, a different repair method, or help from a repair professional may be more suitable.
Match the method to the fabric. A woven patch can work on woven cloth, while a knitted sock may need darning or a knit-specific repair to avoid an uncomfortable stiff spot. For a tear at a seam, check whether the seam allowance is intact before sewing; if it has frayed away, a simple line of stitches may not hold.
Visibility is optional. Choose matching thread if you want the repair to blend in, or a contrasting color if you want the stitches to remain legible. In either case, the repair should support the cloth rather than cover damage without addressing it.
Useful mending supplies
A small mending basket can keep basic tools together. Choose supplies for the clothes you actually wear, and store needles and scissors safely.
- Check that fabric scissors cut cleanly; if they snag or chew the cloth, use sharper scissors or have them sharpened before trimming a patch.
- Check that your hand-sewing needles pass through the fabric without excessive force; if they bend or drag, choose a needle better suited to the material.
- Check whether your thread matches the garment’s weight and care needs; if it is too fine or unsuitable for washing, choose a stronger compatible thread.
- Check whether a fabric scrap has a similar weave and weight to the garment; if it is much heavier or stretchier, choose a closer match to reduce pulling.
- Check that a thimble fits securely and helps you push through firm cloth; if it slips, adjust its fit or sew without it rather than forcing the needle.
- Check whether a darning egg or smooth rounded support sits comfortably inside a sock or sleeve; if it strains the opening, use a smaller support or another stable surface.
- Check that embroidery floss can pass through the fabric without crowding it; if the stitches leave bulky holes, use fewer strands or finer thread.
Questions about visible mending?
What is visible mending?
Visible mending is repair work left apparent rather than disguised. It includes patches, darning, and reinforcing stitches that can also contribute to a garment’s design.
Is visible mending only decorative?
No. Its practical purpose is to address damage, though color and stitch pattern can add decoration. A striking repair still needs to suit the fabric and support the worn area.
When should a patch be hidden?
A hidden patch may suit a formal garment or someone who prefers a less noticeable repair. Visibility is a choice, so consider how the garment will be worn and what appearance its owner wants.
Can every tear be mended at home?
No. A delicate textile, a complex seam, or widespread fabric weakness may need a professional repairer. For home sewing, choose damage you can assess without risking further harm.
Keep the next use in mind
Visible mending joins practical repair with personal design, but appearance alone cannot tell you whether a garment is ready to wear. Look at the repaired area after stitching: if the cloth lies flat and the seam does not pull, the fix may suit its intended use; if it puckers, feels stiff, or strains nearby fibers, revise the repair or seek help.
Visible mending works best when each choice serves both the cloth and its wearer. Keep a suitable scrap and thread with your sewing supplies, and consider the garment’s next use before choosing a patch that will show.